Last October I purchased a “Console Vault Jeep Grand Cherokee 2011-2021” which is a drop-in vault for the center console. At the time I paid $269 for it but the price is currently listed at $299. While the vault is a great idea, this model had some strengths and ultimately weaknesses that mean it was not usable. In the end, I had to remove it without being able to use the key. In doing so, it was easy to see how secure this vault would be if it fit properly. I ended up having a long email thread with the vendor (consolevault.com) who offered to send me a replacement, but communications broke down.
When trying to install it, the vault did not line up perfectly in a 2021 Grand Cherokee. This caused a slight gap on one of the sides of the console which led to a screw falling down. Additionally, one of the two screw holes to secure it did not line up and could not be used. These are highlighted in red:


While this was not convenient, it did not stop me from anchoring the vault to the center console via two internal heavier screws. So at this point, the vault was functional and secure enough to use. A few days after installation I tried to open it to retrieve an item and found I couldn’t. The key would turn 90 degrees as it should, but the door would not budge. That sent me down the path of having to break into it.
I don’t believe the vendor had performed a real-world test of what it takes to get into a ConsoleVault, but we have one now. The design of this as far as security goes is really good, my friend and I are both impressed. Each of us have done commercial penetration testing before which has included lockpicking, physical break-ins, etc. Having the opportunity to do this is kind of neat. My friend Bill has a much better collection of hand tools and know-how so I got him involved.
During the email thread, the vendor recommended the following method to drill the lock:
We recommend a quarter inch metal drill bit and to drill directly down through the lock itself.
As you can imagine, with a vault installed in a vehicle, it does limit options since you can’t just put it under a stationary drill-press. Bill began by confirming the body was hardened using a punch. The top brass gave way enough with the punch to make it look like this would be easy to get through, but that was deceptive. He attempted drilling the lock with carbide tooling but that proved difficult due to inability to fixture the work.
Ultimately, the suggestion to use conventional drills (AKA “high speed steel” / HSS, which is what all standard metal-capable drill bits are made of) to drill the lock body probably was said not fully understanding their product features; both the body collar and the center alignment post of the plug are very definitely hardened, meaning the parts are just as hard as HSS drill bits, which means HSS bits cannot be used.
The vendor also said:
As for the lock, if there is something blocking it you can either force the key to continue turning with either your hands or a wrench, but this does have the potential to damage what ever is blocking the lock from turning on the inside.
At this point he thought with the key in, he could use vice grips to force it open enough but that didn’t work. He was able to get the key to do a full 360 degree turn, presumably because the entire lock body was turning and not just the latching mechanism. The durability of the key made this possible. While we don’t think this style of attack is viable to get into, using a weaker key could be a way to combat such an attack. A key that broke off or bent enough could foil that avenue.
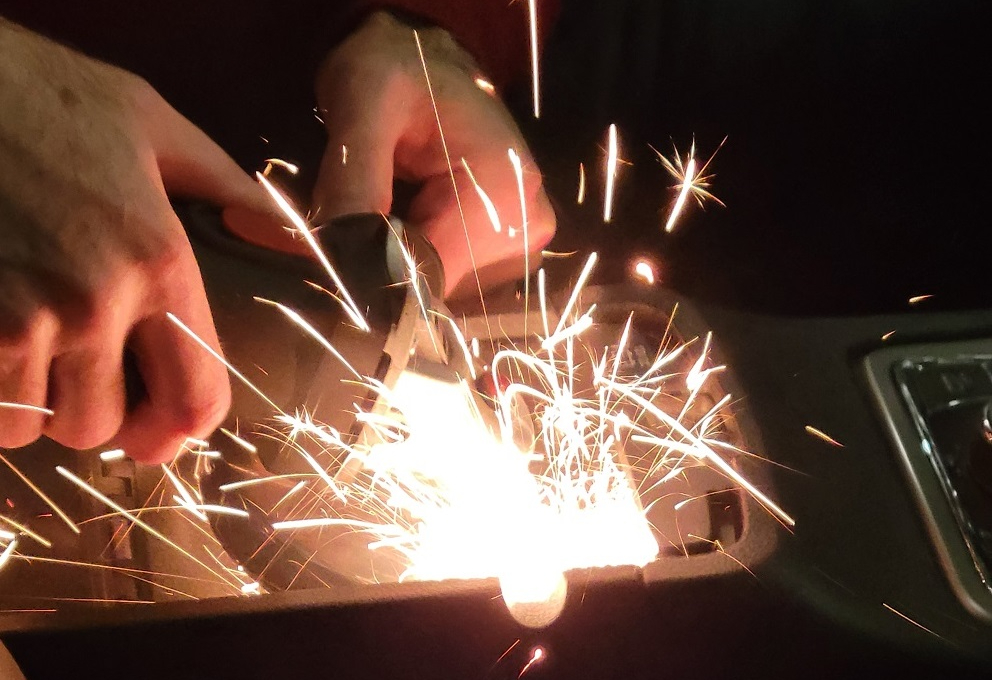
Next, he used an abrasive cutoff wheel in an angle grinder to entirely remove the exterior lock collar. The initial grinding, as you can imagine, is not fun. After a minute we realized the sparks were hot enough to damage the interior top of the console, melting it a little.

With half the collar gone, we thought it could be drilled at this point. That proved wrong as well. While there was some brass, it gave way to more steel.

He went back to grinding the rest of the collar off, which required about 15-20 minutes total cutting time.

With the collar completely off, we figured (hoped?) there wasn’t a more serious fastening method on the bottom and we could push the lock body through the door into the safe compartment:

Fortunately, we were right! This is where I might normally recommend adding some kind of collar on the bottom to make this even more painful to get through, but given it was around 45 minutes start to finish trying to figure out which methods would work and ultimately going this route, I don’t see this lock being popped by traditional break-in short of stealing the vehicle and having plenty of time with it. It certainly won’t get popped while you run into the post office for example.
So, why was this impossible to open? The vendor was right! One of my cables that was coiled at the bottom of the vault had apparently decided to stand up, presumably due to vibrations in the vehicle while driving. When I locked it, it drug the cable into the latching mechanism as you can see here:

Our first observation was that the hole for the latching mechanism is simply too big. That is what gave it plenty of opportunity to drag the cable in and get caught. As mentioned in a prior mail to the vendor, we recommended adding a very thin aluminum guard from the lip of this out toward the lock and that would prevent this from happening. We actually recommend both be done to help ensure the lock does not get caught up.
The one thing I still don’t understand is how the lock turned the full 90 degrees, while caught up in the cable, and the vault did not open. In my mind it still seems like it should have turned up to 75 degrees perhaps, then met resistance. Mysteries for another day I guess.
Regardless, we’d like to commend the vendor on the physical resilience of this console safe. It makes me happy as I believe this is a good investment once installed properly and the latching hole improved. Unfortunately, I learned the hard way about the latch shortcomings and now have no vault in the vehicle.
Leave a Reply